
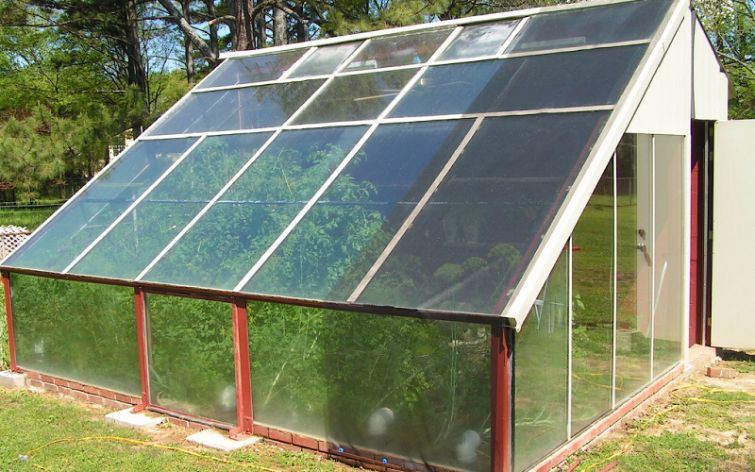
Given that you have complete control over the growing environment in a greenhouse, you can grow plants and vegetables there all year long. Heating the greenhouse is necessary to maintain the best growing conditions during the winter when the temperatures drop to extremely low levels.
Using a solar heating system is one efficient way to warm the greenhouse during colder weather. In this article, we’ll show you how to heat a small greenhouse with a basic solar system. Please keep reading.
What Is A Solar Greenhouse Heater?
A solar greenhouse heater distributes the thermal energy that the sun transforms into. It requires collectors, which can be solar heat absorption panels or photovoltaic (PV) panels, to accomplish this.
When using PV panels, the heat is typically produced by an electric heater. For a solar installation, effective heaters with moving air are preferred. On the other hand, solar heat absorption panels directly generate heat that is then dispersed through convection or a 12V circulation fan that is powered by an additional PV panel.
You’ll probably have to purchase the collectors and heater separately if you decide to use a PV collection system. Batteries or thermal mass storage are also required.
Unlike a PV panel system, a solar furnace is delivered as a single unit, making setup simpler. It basically consists of a black panel that warms up when exposed to sunlight.
It draws cold air from the greenhouse, warms it up as it moves around the panel, then returns the heated air to the greenhouse. Because hot air rises, the cold air intake is at the bottom of the panel and the hot air vent is at the top. Convection is how air naturally circulates. A fan enhances heating and circulation.
Types Of Solar Greenhouse Heaters
It’s a tried-and-true method to keep greenhouses warm at night: place water barrels in sunny spots where they’ll warm up during the day and radiate heat at night. The simple DIY answer is to do that. Commercial systems offer at least three options:
- PV panels: These transform solar energy into electricity, which powers a space heater.
- Solar furnaces: The panels, which are typically installed in greenhouse walls, absorb sunlight and warm the air there.
- Hot water panels: Water is heated by solar absorption panels and then pumped through pipes in the walls or floor of the greenhouse.
Pros And Cons Of Solar Greenhouse Heaters
These mirrors the pros and cons of solar power generation systems in general:
Pros
- Free heat and energy are yours to keep!
Cons
- Energy can only be obtained when the sun is shining. For cloudy and nighttime days, you will need a storage system or backup heating.
- Depending on how the greenhouse and the property are set up, installing panels may be challenging.
- Periodically, panels need to be cleaned. Thus, snow must also be removed.
Is It Possible To Use Solar Panels To Heat A Greenhouse?
The main use of PV solar panels when discussing heating a typical mini or hobby greenhouse is to charge batteries that will power a space heater at night. In the daytime, especially if the greenhouse was constructed facing the sun, you don’t really need a space heater.
If that is not the case, you can use the solar energy from the panels to run fans inside the greenhouse to bring warm air in from the outside.
Theoretically, heating your greenhouse with solar panels is therefore a possibility. A set of batteries, a solar charger, an inverter, a heater, and PV solar panels are all necessary. Similar to any other solar power application, there is a complete process involved.
However, whether it is practical depends on a number of variables, including the size of your greenhouse, the amount of heat needed based on the surrounding temperature, the quality of the solar panels and batteries, and the ensuing cost.
How To Heat A Greenhouse With Solar Panels?
Materials To Build A Simple Solar System For A Greenhouse
Given that solar renewable energy is widely accessible, you now have two options for getting one.
You can either invest once in a complete set or a solar kit, or you can buy each part separately and assemble it yourself.
Setting Up The Solar System
The steps for setting it up are the same whether you choose a solar kit or the DIY route. Here’s how:
Step 1: To avoid any damage to the parts, let’s connect the system’s components before establishing the energy source. Begin by connecting the positive and negative cables of the inverter to the battery, respectively.
Step 2: The battery and charge controller should then be connected. Strip the cable’s ends gently so you can screw them into the charge controller. The charge of the battery is displayed on the charge controller’s LED screen, as you will see.
Step 3: Let’s connect the system to the power source now. The cables should be used to join the solar panel and charge controller. Make sure that the solar panel and the charge controller’s positive and negative indications are in sync.
Step 4: Check the connections, but also give the system a go. Here are some tests that you need to try:
(a) Attempting to turn on the inverter to see if it’s running will work if your battery has an initial charge. If the connection is sound, you can hear the inverter running.
(b) In the charge controller, verify the initial charge. Then, turn the solar panel toward the sun and check to see if the charge controller’s numbers have changed. When it begins to change, your battery is likely already being charged by the solar panels.
(c) Try plugging an AC appliance with the inverter, such as a cellphone charger, while it is turned on.
(d) The charge controller can also be used to power a DC fan or light. You’ve successfully put together your first solar system when everything you connect to it turns on, and you’re now ready to put together the heating appliances!
Solar-powered Heater For Heating Water Or Air
Installing a heating fan connected to your inverter can help heat the water or air that circulates throughout a small greenhouse setup.
Materials
- 2 100-watt solar panel
- 1 or 2 pcs. 12 V Fan Air Heater for Small Room Space (100W)
- Screwdriver
- Pliers
- Electrical tape
- Extension wires for the heater
- Soldering iron
- Rosen core
- Old extension cable
- Wood Mount
- Toggle switch (SPIELE ON-Off 2 Position Rocker Toggle Switch)
Directions
(1) The wires of the two heaters should be facing the top as you glue them together side by side. The fan is powered by the thin wires in the back, while the heater is powered by the three thick wires in the front.
The heater’s top and bottom wires should be connected, and a red wire should be added to extend it, to get them ready. Connecting the heaters to the switch requires doing this for both of them.
(2) One end of the extra extension cord should be connected to the solar panels, and the other end should be soldered to the switch’s backside.
(3) The red wires from the heater and fan should then be soldered to the opposite side of the switch.
(4) The positive charge from the solar panel is carried by the red wire, while the negative charge is carried by the black wire.
Connect the red wire from the solar panel to the switch’s black wire now. Then use a spare wire to combine the heater’s and fan’s black wires into one, and attach it to the black or negative wire.
(5)By turning the switches on and off, test out your new solar-powered heaters. Keep in mind that only one solar panel should be connected to each heater. Plan how you will set it up in your greenhouse now, ideally where there will be cold drafts.
A DC regulator or charge controller can be connected to a storage battery in order to obtain the charge or energy from it. The fan and charge controller should then be connected.
Fireplace Insert With Heat Extender Using Fans
Finding a different heat source besides heaters is a practical alternative to using heaters to warm a greenhouse.
In this configuration, a wood-burning insert will serve as the primary heat source, and solar-powered fans will be used to evenly distribute heat throughout the greenhouse.
Materials
- Screwdriver
- Pliers
- Electrical tape
- 2 to 3 12V AC Fan
- 2 to 3 Temperature-sensitive switches (DuctStat Temperature Sensitive Switch)
- Extension outlet
- Extension wires for the fans
- Solar system setup
- Wood-burning insert (Vogelzang Plate Steel Wood Burning Insert with Blower)
- Aynaxcol 4 Blades Heat Powered Stove Fan
Directions
(1) If you live in an area with freezing temperatures, we advise installing a wood-burning insert in this setup.
The heat will then be dispersed throughout the greenhouse by a heat-powered stove fan placed on top of the wood-burning insert. Additionally, as was already mentioned in this post, you can prepare your off-grid solar system.
(2) Once the solar system is operating, connect the temperature-sensitive switches to the inverter and an outlet extension. These switches have a sensor that only activates a connected appliance when it reaches a certain temperature. It aids in ensuring that the fans only turn on when necessary. Put the switches close to where your fans are located.
(3) The fans should then be installed all around your greenhouse and plugged into the temperature-sensitive switch that is right next to it. You can add an additional battery to help meet the energy demand if you plan to use more than one fan.
(4) A temperature monitor should be positioned both above and below the greenhouse to determine whether the heat is being distributed evenly.
What To Take Into Account When Purchasing A Solar Greenhouse Heater?
Practically speaking, unless you include a means of energy storage, heating a greenhouse entirely with solar is not feasible. Compared to traditional gas or electric heaters, solar heaters are less expensive to operate. When shopping for a solar heater, consider the following:
- The size of the greenhouse: Larger heaters and more panels (or more effective ones) are needed to heat a large area. If you have a solar power system, monocrystalline (rather than polycrystalline) cell panels will offer better heating efficiency, but they are more expensive.
- The purpose of the greenhouse: In a cold winter climate, you need a lot of heat to grow tropical plants. If all you plan to do is start seeds in the early spring, you probably won’t need as much.
- Available space for panels: To install PV or heat-absorbing panels nearby the greenhouse, you need free, south-facing space. The greenhouse roof cannot have panels because they will block the light.
Tips On Effectively Heating Greenhouse With Solar Panels
The effectiveness and efficiency of your solar panels in your greenhouse are greatly influenced by how they are installed. When positioned perpendicular to the sun’s rays, a solar panel is in its ideal orientation. The ideal tilt angle is one that is equal to the location’s latitude.
Furthermore, if you are in the northern hemisphere, the panels’ faces should be facing the true south.
Additionally, since any level of shade will significantly affect the performance of the solar panel, make sure to install the solar panels in a place that is not shaded between the hours of 9 am and 3 pm. Direct sun exposure is the best method for maximizing effectiveness.
A good insulation job will help you effectively heat a greenhouse with solar panels by preventing heat loss and ensuring efficient heat transfer.